Internalization with NextJS
Since the release of v10.0, NextJS has added a support for internationalized (i18n) routing out of the box. This makes it possible to build multilingual web applications without the use of external libraries such as rosetta, react-i18next, react-intl etc.
Although the documentation mentions that i18n routing is meant to complement the existing i18n solutions like the libraries listed above, in this guide, I will show you how to configure and create internationalized web app without using these libraries.
Building a multilingual website or an application has 2 parts to it - 1. Internationalization(i18n), and 2. Localization (l10n). Next.js provides a way to implement internationalization, but is totally unopinionated about how to implement localization.
Differences between localization (l10n) and Internationalization (i18n)
Let's start by understanding the differences between these terms.
Internationalization -
In simple words, internationalization is a process of designing and developing our application in a way that can be adapted to different regions and languages. Next.js enables us to do that through the features such as Domain routing (based on locale), locale detection and a way for us to access user's locale information.
Localization -
Localization is the process of adapting your application for a given locale or region. This includes things like adding translations, adapting the app layout to the correct language directions such as for Arabic, you need to flip the layout to make the content direction from "Right-to-Left".
In this guide, I will walk you through both of these phases step by step to build a multilingual application. You can check out the demo of the final app below.
To follow along, you will first need to clone the starter repository. After cloning, just run yarn or npm i to install all of the dependencies and then start the server with the command yarn dev or npm run dev.
What you will see is the application just like the demo above but without all the language switching capabilities. Let's quickly walk through the initial setup -
If you open up the package.json file, you will notice that I have added tailwindcss for easy styling, useSWR by vercel, which they recommend to use with Next.js for client side data fetching and the last one is the lodash which adds some utilities, that we will need in a bit. Other than these, dependencies like postcss and autoprefixer are required for tailwindcss.
We have 2 pages at the moment - home and blog page. Home page just contains some static placeholder text, while on the blog page, you will notice that we make an api call to the custom api route. I have created a custom serverless function that listens to the incoming request on this route, then reads the json from the posts.json file and returns the data that is then rendered on the frontend. That's the overall summary, we will discuss more details about the logic in this function a bit later.
Let's get started...
Firstly, let's tackle the phase 1 - Internationalization (i18n). We can do this by following the Next.js documentation about internationalized routing. Next.js offers 2 strategies for routing - 1. Using sub-path routing i.e. your domain would look like this domain.com/en/blog, and 2. Domain Routing - in which case, your domain might look like - domain.en/blog.
The best part is once you configure the supported locales and the strategy in next.config.js, Next.js will try to automatically detect the user's locale based on the Accept-Language header and will redirect them to the correct domain.
I am going to configure the sub-path routing strategy, so in the next.config.js file, I am going to add the configuration as per the docs.
module.exports = {
  i18n: {
    locales: ['en', 'fr', 'ar'],
    defaultLocale: 'en',
  },
  trailingSlash: true,
  images: {
    domains: ['img.dummyapi.io']
  }
}
As you can see, in this guide, we will support 3 different languages, so I added those as an array to locales property and by default we will support en .
trailingSlash is optional. I personally prefer seeing a slash at the end of the url, but feel free to delete that line if you prefer otherwise. images property is to support the use of Image component that was also introduced as a part of v10 release.
So once you add this change and restart the server, you will not notice any difference upfront, but if you change the url in the browser to localhost:3000/en or localhost:3000/fr , you will notice that the same content is rendered but it doesn't throw 404. This means that we have added the internationalization capability in our application now.
Wiring up the language switcher
Let's make our language switcher in the Navigation bar functional. At the moment, when you click on any of the buttons, it does nothing other than logging the language we pass in the callback to the console.
Since we are using a button and not a Link component that Next.js provides, we will use the router.push method to change the url.
In the Nav.jsx file, import useRouter from next/router and then access the router. Here are the changes in the Nav file
import Link from 'next/link';
import { useRouter } from 'next/router';

const Nav = () => {
  const { push, pathname } = useRouter();

  const handleLangSwitch = lang => {
    push(pathname, pathname, { locale: lang });
  }

  return ( .... )
From the useRouter() function, we first destructure push method and the pathname. We can then push from current pathname as source to itself as destination and then switch the locale by passing it as the third parameter.
Now if you click on any of the language buttons, you will notice that our url behaves as expected and we can see that the language get transitioned. Also as a best practice for SEO, Next.js also automatically adds lang attribute to the <html> tag. You can check this by opening up the element inspector in dev tools
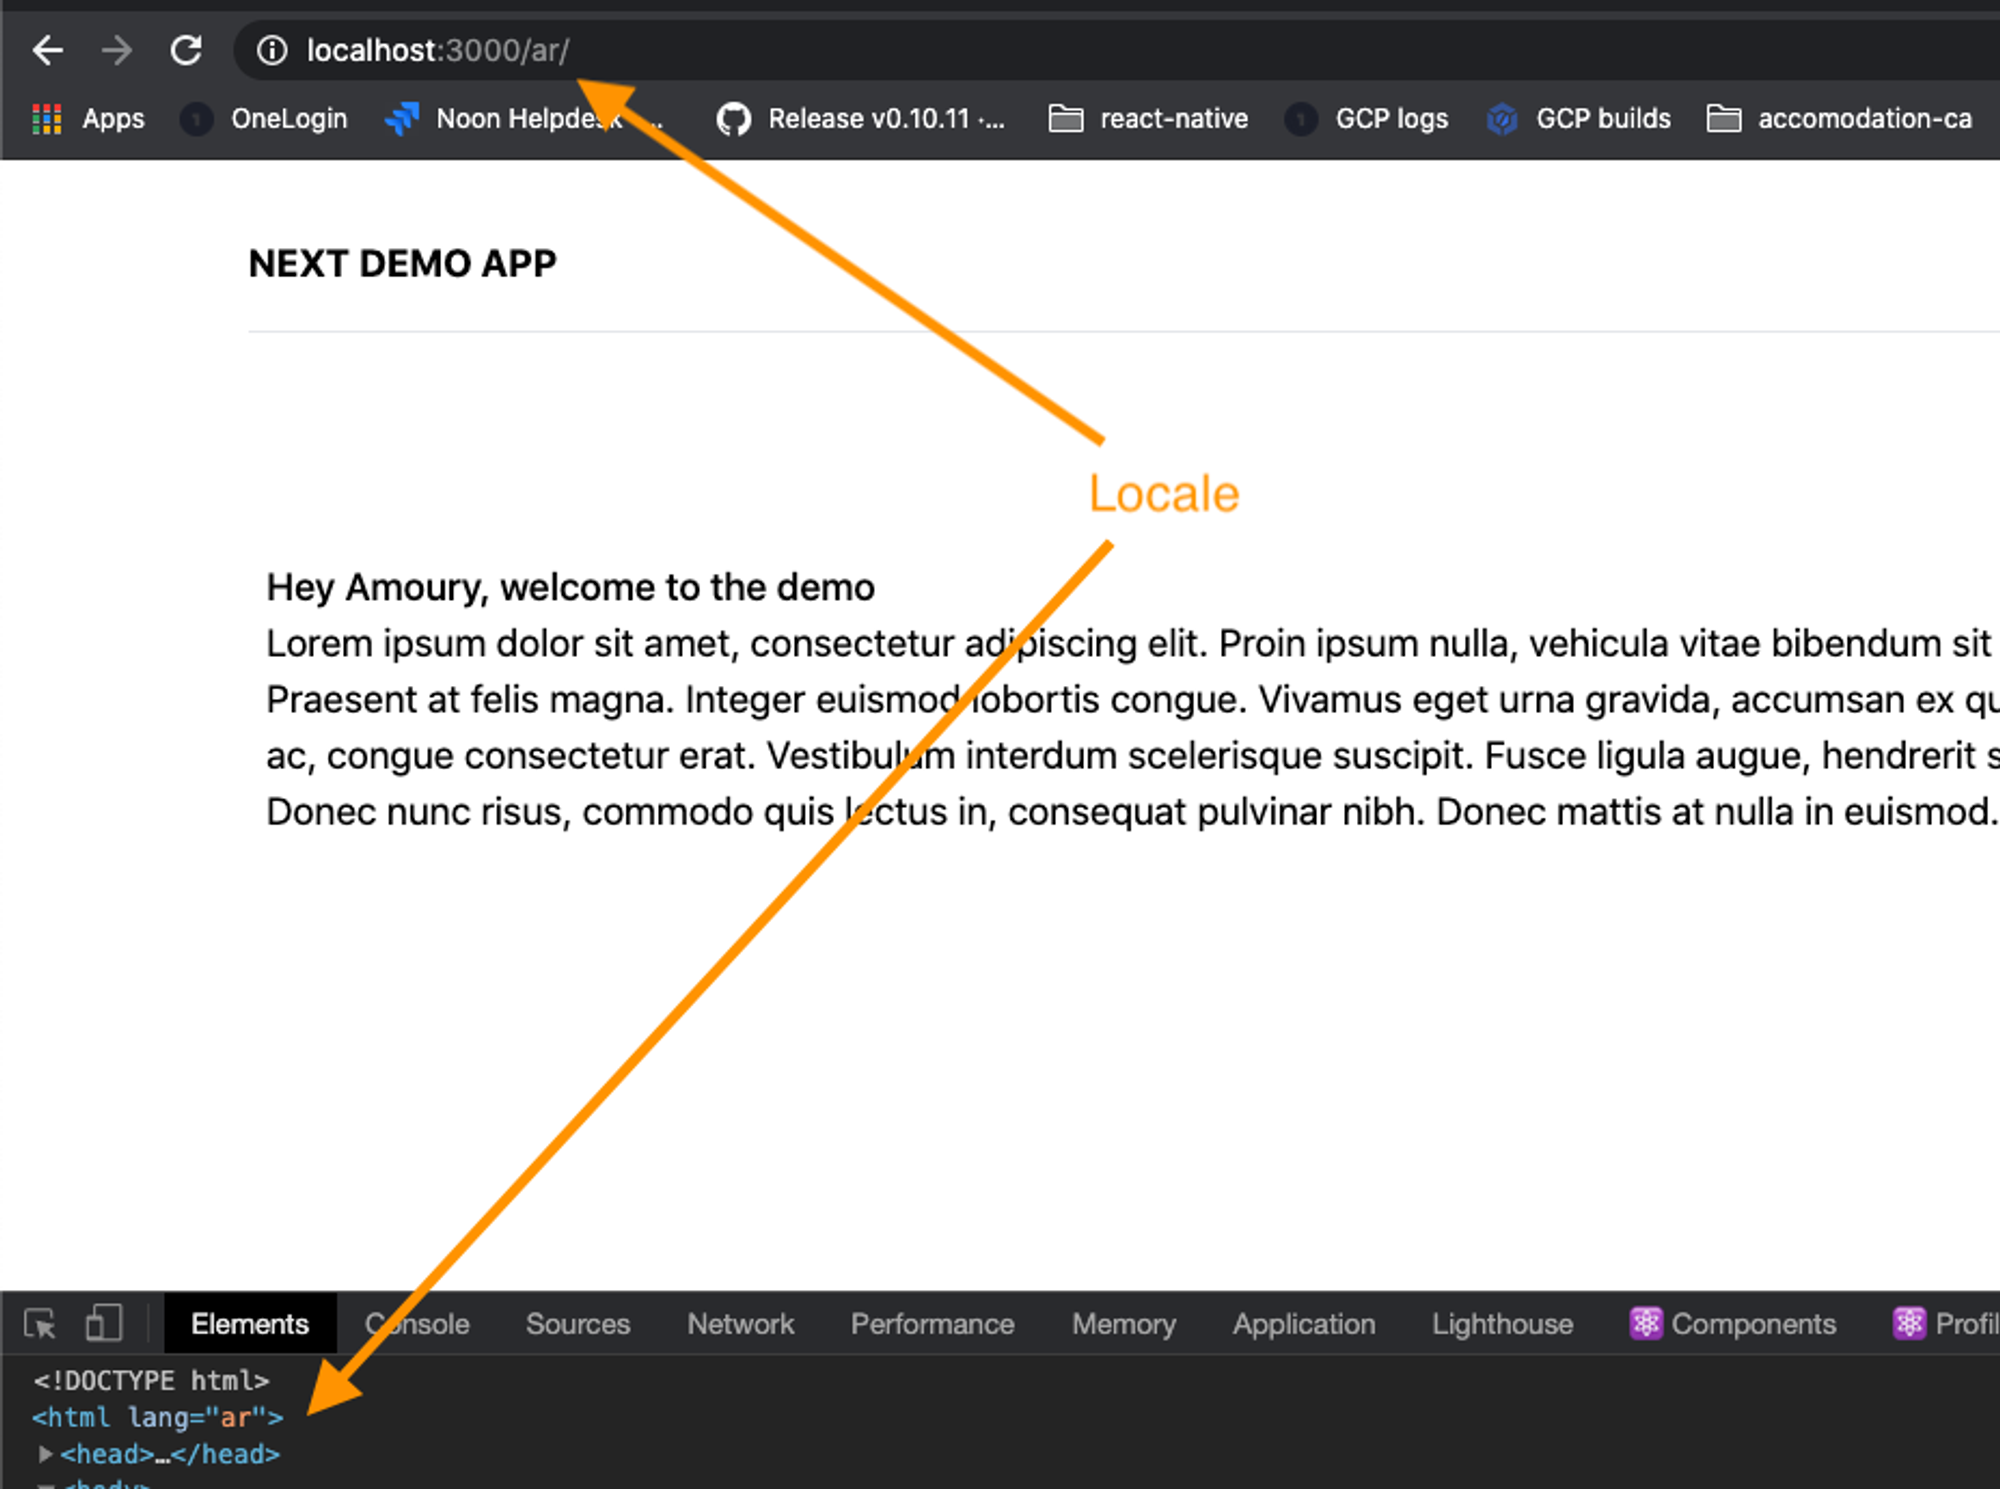
This is perfect when you are only concerned with the languages that are "LTR" (Left-to-right). But for "RTL" languages such as Arabic, we also need one more attribute, dir which switches the layout from right-to-left.
Next.js currently does not provide any out of the box way to do this. So we will need to add some kind of workaround to make this happen. One approach to do this would be through _document.js file. This is the only place where we have access to the global Html tag. So let's do that.
Switching document layout based on the language...
In _document.js file in the Html tag we can easily add dir attribute. The only thing we need is the way to access locale information based on which we can conditionally switch the layout. I have tried different approaches to access this information in the document, but the approach that I have found to have worked most reliably is to get this info from the page props.
Next.js adds this information under __NEXT_DATA__ prop.
So, here are the code changes to add this attribute
import ...
class MyDocument extends Document {
render() {
const { locale } = this.props.__NEXT_DATA__;
return (
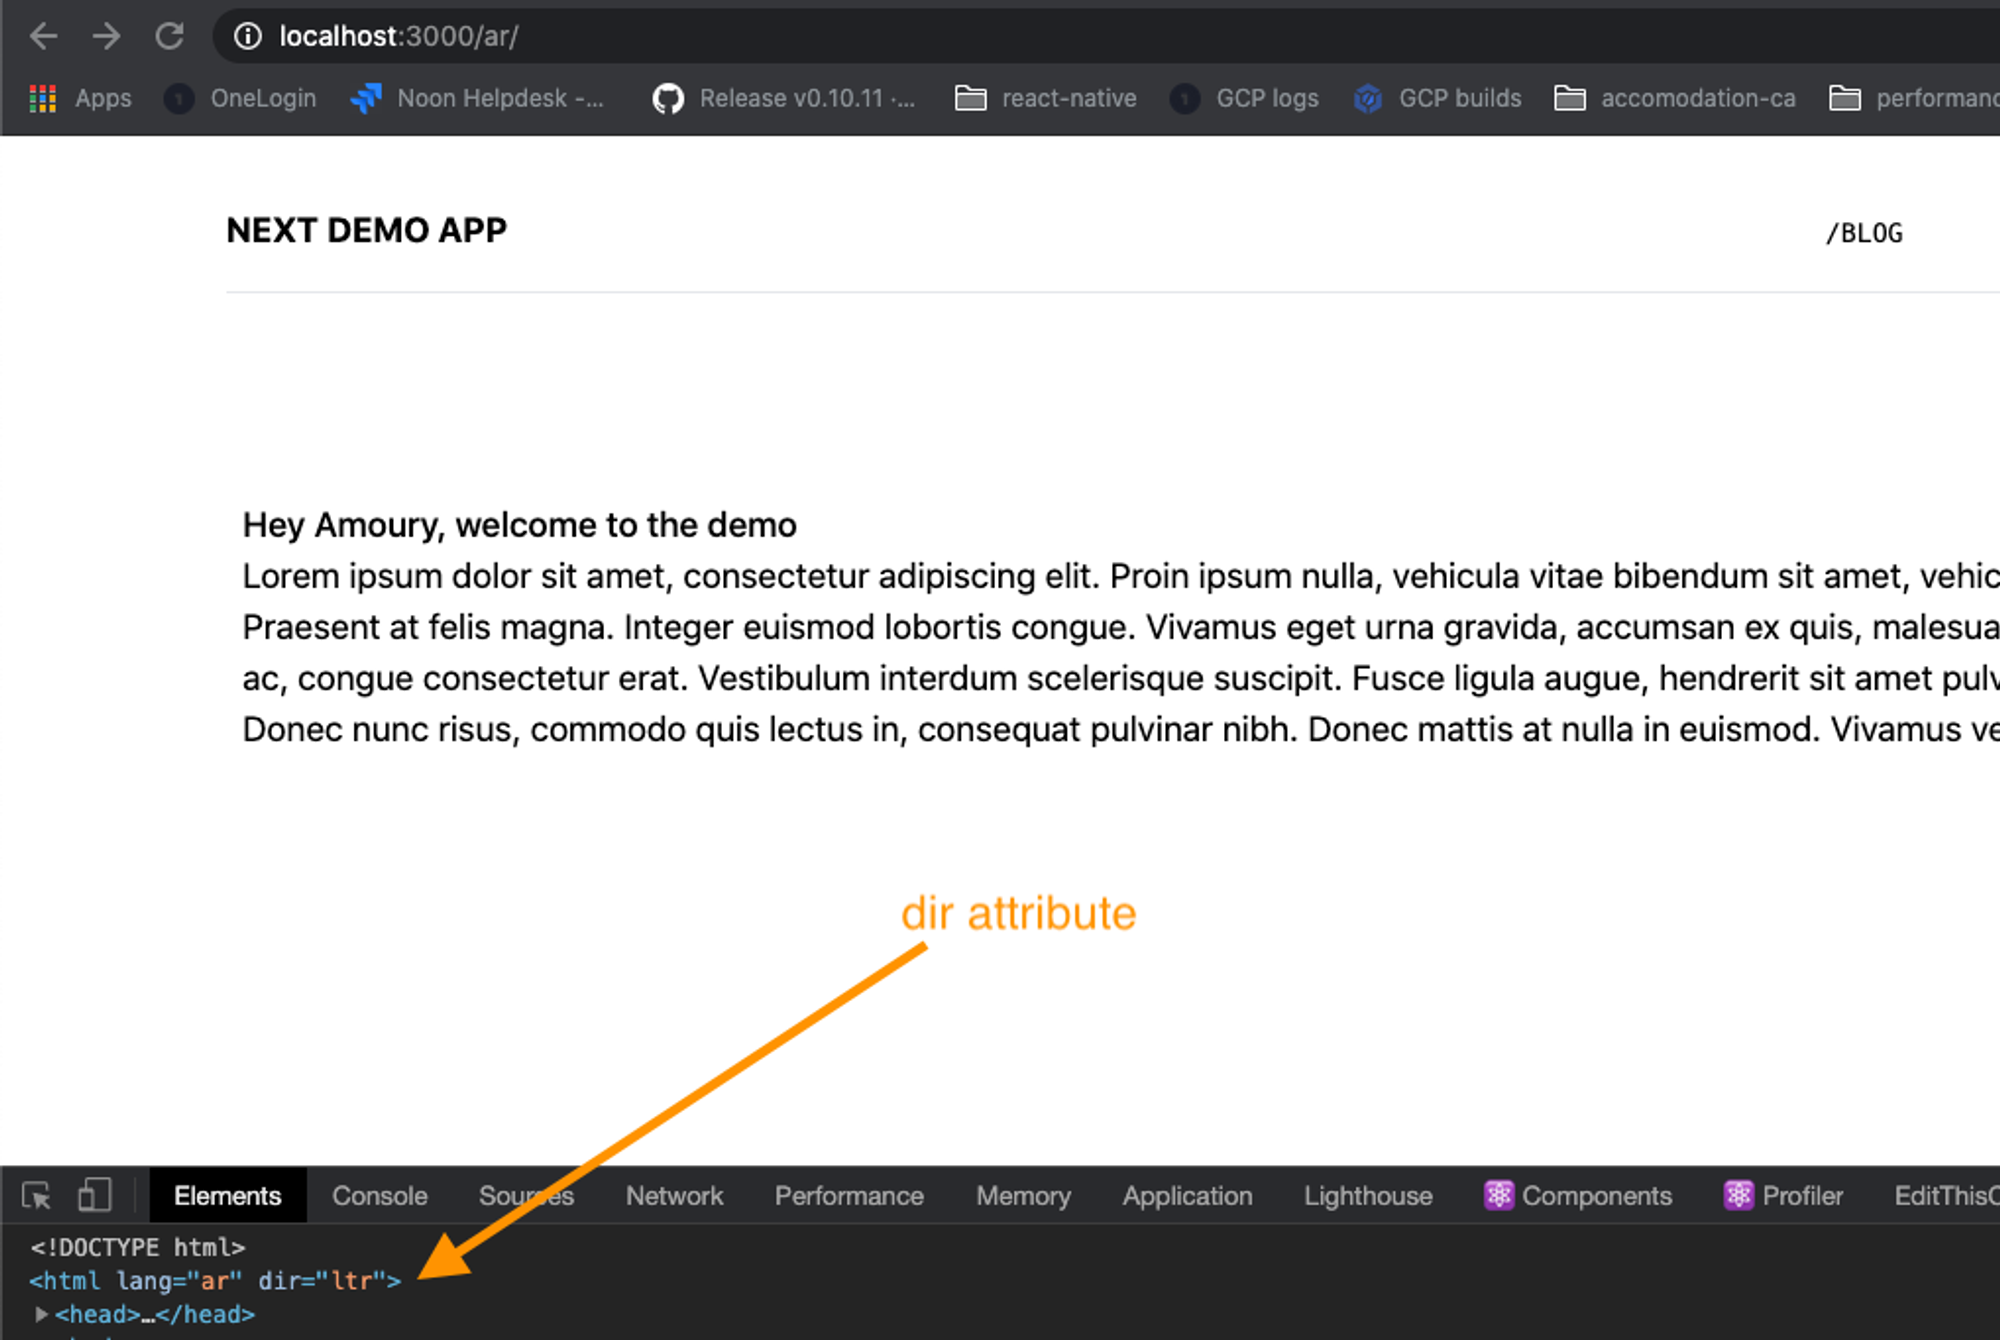
<Html lang={locale} dir={locale === 'ar' ? 'rtl' : 'ltr'}>
<Head />
<body>
<Main />
<NextScript />
</body>
</Html>
)
}
}
export default MyDocument;Now if you try switching the language and notice the difference, you will see that our dir or direction attribute is getting added as expected. But there is still one problem, the layout is still not changing the way we want it to.
The only way to force this layout switch is through refreshing the browser. To make this happen, we will have to force the refresh whenever language switch happens. So, let's add some workaround in our handleLangSwitch function under Nav.jsx.
One of the ways to do this is through the use of location.replace method on the window object. So let's do that -
const Nav = () => {
  const { pathname } = useRouter();

  const handleLangSwitch = lang => {
    const { origin } = window.location;
    window.location.replace(`${origin}/${lang}${pathname}`)
  }

  return ( ... )
}
If you now click on the language switcher, you will notice that the layout gets flipped for the Arabic locale. The only problem with this approach is that the app will lose its state, but its the trade-off that we have to take given the framework constraint. Hopefully, the Next.js team resolves this in the future.
Localization
Now that we have a way a to switch locales, we need to add some setup to localize the app by adding translations. This is where Next.js is completely unopinionated and doesn't have any mention about the best practices in the documentation. This is where we are left on our own.
You can use one of the internationalization libraries that I mentioned at the beginning of this guide, but for the purpose of this guide, I am going to show you a way to roll your own translation system which works perfectly well in production for apps of any scale.
If you open up utils/i18n folder, you will notice we have 3 files - en.json, ar.json and fr.json. In these files we add translations as key-value pairs. The signature of this json has to be identical for all the files for our translations to work correctly.
Firstly, we will create a translate utility function that accepts our current language and token as arguments and returns the translated values from these json translation files.
Let's create translate.js file and add this code, then we will discuss it in detail -
import en from './en.json';
import ar from './ar.json';
import fr from './fr.json';

const TRANSLATIONS = {
  en,
  ar,
  fr
}

const translate = (language = 'en', token) => {
  let value;

  try {
    value = TRANSLATIONS[language][token];
  } catch (error) {
    console.error('Translation Error ', err);
    value = token;
  }

  return value;
}

export default translate;
We firstly, import all the data from json files into a single TRANSLATIONS map and then we read from there. We are using try-catch block, in case a translation key is missing in the object, then we want to catch the error, display it to the developer and prevent the app from breaking completely.
Let us now try to make use of this utility on our homepage (index.jsx). We will first start with the most basic static text inside p tag. Here's what my index.jsx looks like -
import Head from 'next/head'
import { useRouter } from 'next/router'
import translate from '../utils/i18n/translate'

export default function Home() {
  const { locale } = useRouter();

  return (
    <div className="px-28">

      <div className="my-24">
        <h1 className="font-medium">Hey Amoury, welcome to the demo</h1>

        <p>{translate(locale, 'lipsum_dummy_content')}</p>
      </div>
    </div>
  )
}
Firstly, I get the information about the current locale from useRouter hook that next/router provides. I pass this locale as the first argument - which in this case would either be en, ar or fr. The second argument is the key from that I copied for that text from the json file.
I can see a problem with our current translate function. With this approach, we will always have to first read locale info from useRouter() in every component that we use it. Not very ideal, is it?
To solve this issue, we will first make use of a functional programming pattern called currying. If you aren't exactly sure about what it is, then you can read more about it here.
In the translate.js file, let us modify our function to use this approach and if you are still confused about what advantage this will bring to the table, you will soon see it.
const translate = (language = 'en') => (token) => {
  let value;

  try { ... }
	catch { ... }

  return value;
}
Keeping everything else the same, we simply make translate function accept single argument language and it then returns a callback function, which accepts the token. If you now notice, on the homepage, the whole p tag is missing. Let's go back to index.jsx and modify the way we invoke translate function.
export default function Home() {
  return (
     ...
        <p>{translate(locale)('lipsum_dummy_content')}</p>
     ...
  )
}
We first invoke translate(locale) function with single parameter, then we invoke the callback that it returns, with the translation key or the token.
We will further refactor it using custom hook useLocale which is the only place we will need to read locale from useRouter. This hook will then return a curried function that takes care of the translation. Let's see this in action, so it will make more sense.
Create a seperate directory hooks and add the file useLocale.js. Here is what the code in that file looks like —
import { useRouter } from 'next/router';
import translate from '../utils/i18n/translate';

const useLocale = () => {
  const { locale, defaultLocale } = useRouter();
  const t = translate(locale);

  return { locale, defaultLocale, t };
}

export default useLocale;
As you can see, this is a simple hook that returns the locale and defaultLocale properties from useRouter() . It also add a function t which is a curried translate function. It takes care of passing the right language to our translate function. So now using this, we will just need to pass the right translation key.
Back in our index.jsx , let's make use of this hook -
.png?table=block&id=01f8d400-384b-4887-aa22-a0d65af69dc8&cache=v2)
After refactoring and making use of our hook, this what the index.jsx file looks like with the lines modified being highlighted.
I