Guide to setup local development environment using Kubernetes (k8s)
In this guide I will take you through the steps to setup local development environment using Kubernetes (k8s) cluster. If you are reading this article, I assume you have atleast the basic knowledge of what k8s is and the purpose of k8s in deploying and scaling real world applications in a cloud environment.
If you are developing microservices and have already chosen Kubernetes as your target runtime, then setting up and working with the k8s cluster locally makes total sense. This way, you can develop multiple services locally and figure out all the networking related nuances that appear from this kind of architecture, even before taking your code to the cloud.
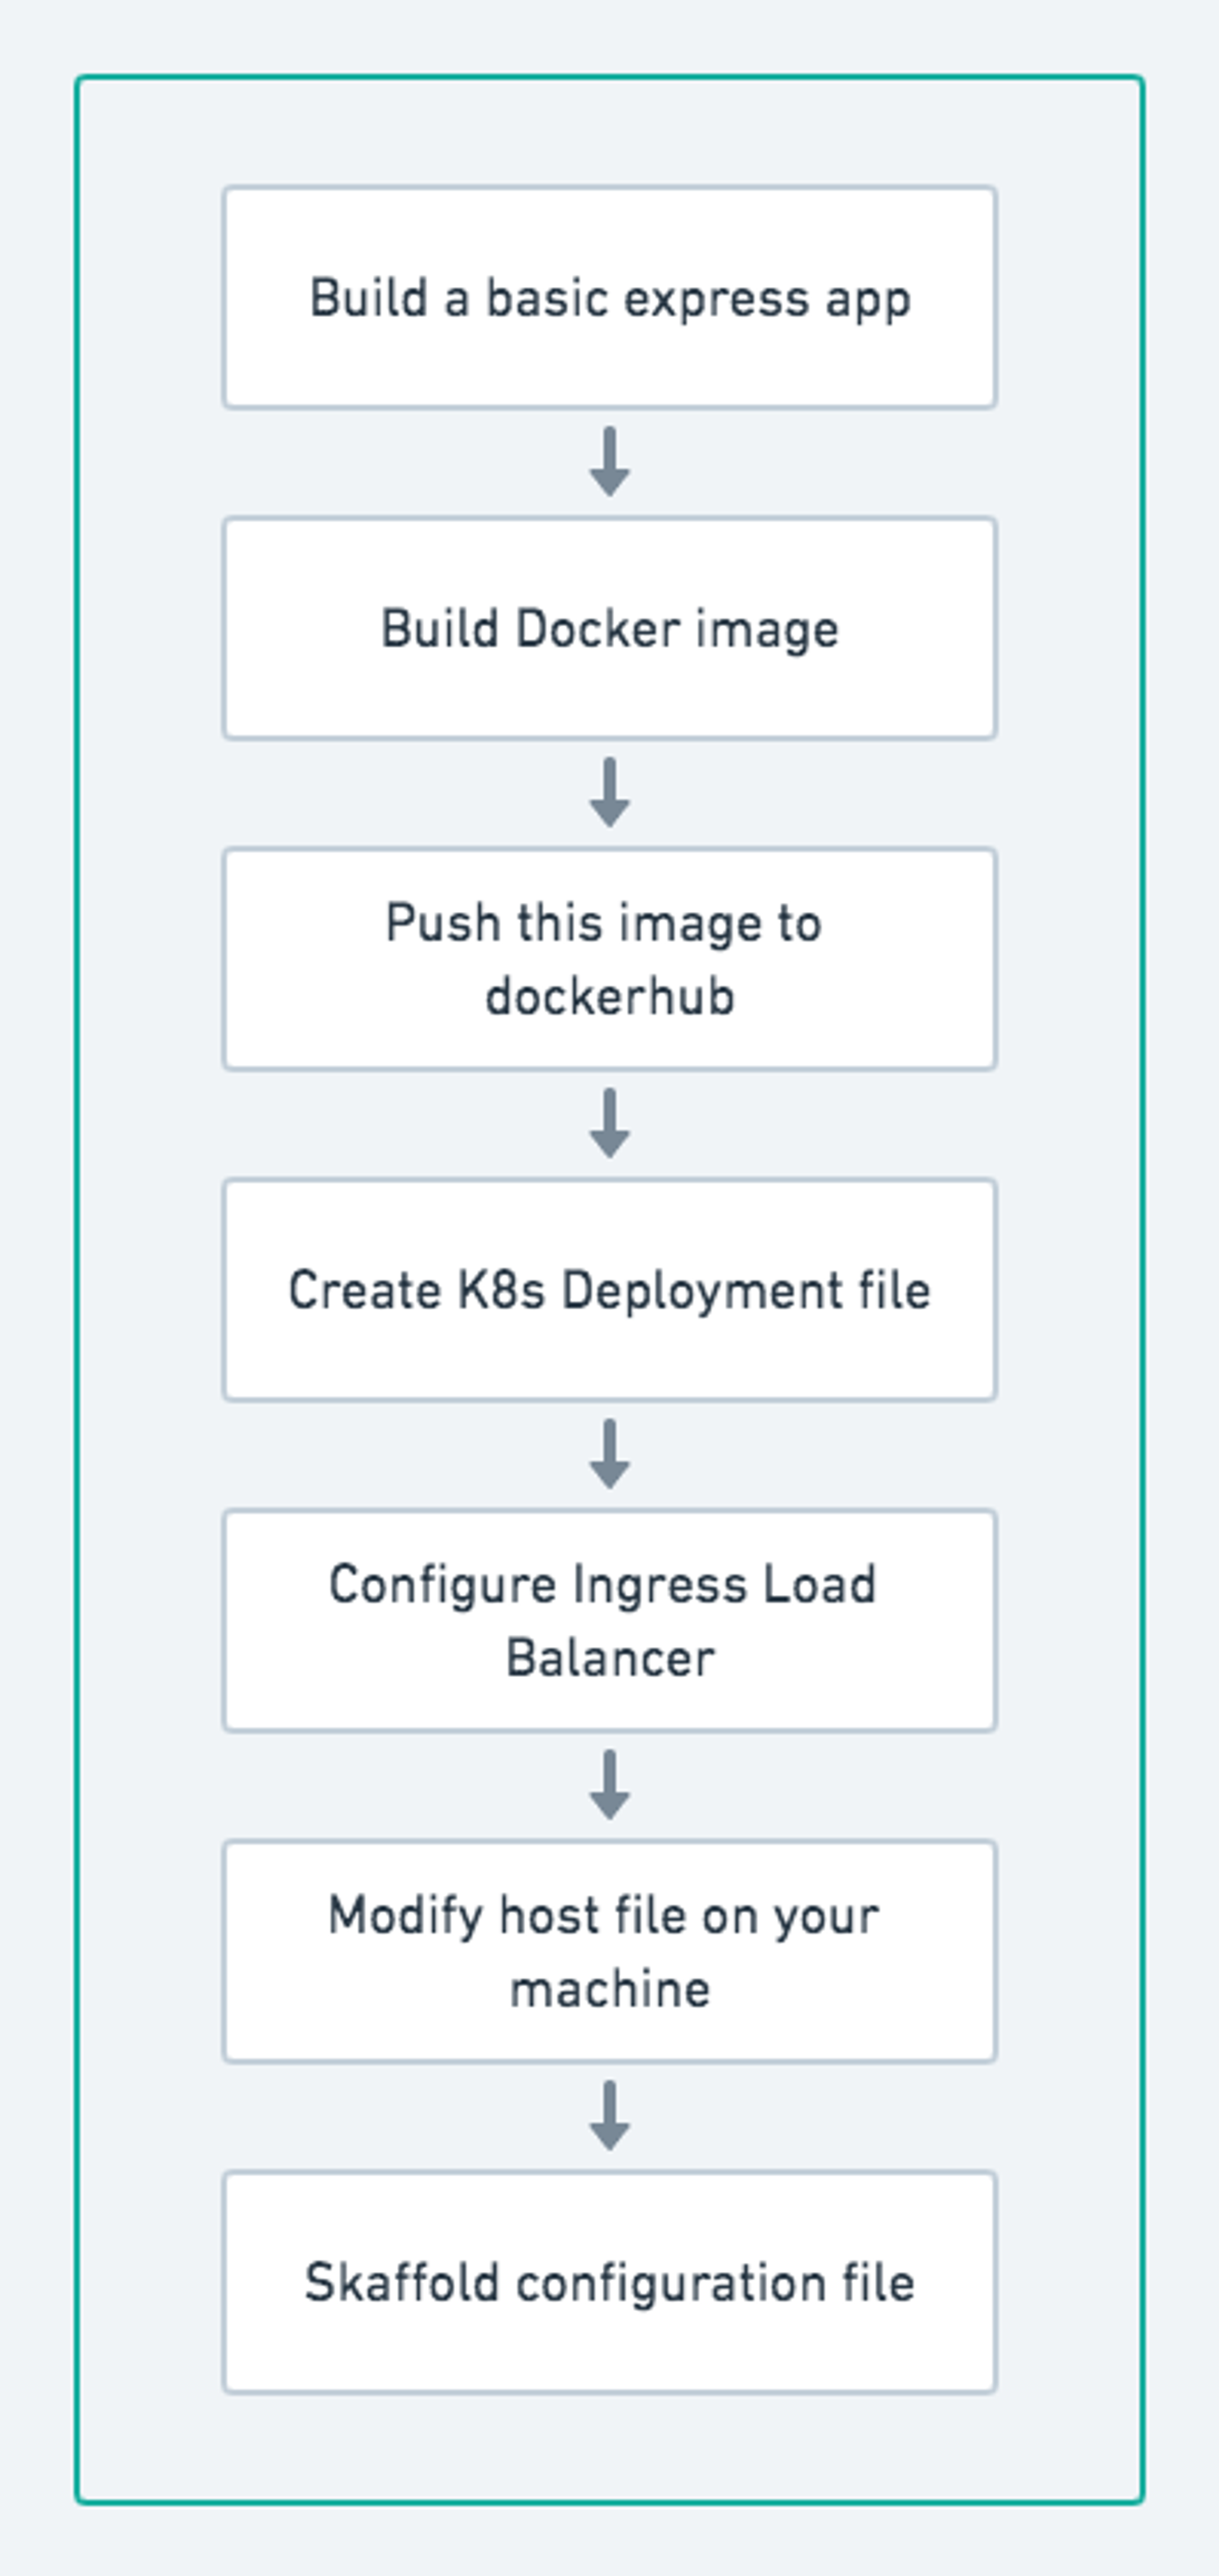
As you can imagine, this kind of setup is a multistep process. Just as an overview, you will first initialize the app locally, then containerize it with Docker, tag your docker images, update Kubernetes deployment files to use updated image and then each time you need to apply them through kubectl for the pods to be updated. This is a very tedious and error prone process, not very ideal for development.
The good news is, we have the tools to manage these steps for us. One such tool that we are going to use today is Skaffold. This is an open source tool by Google and it helps simply our development workflow. Skaffold watches for code changes and whenever it detects them, it automatically builds the container image, changes the k8s config to use new image tag, and deploys the new code on our kubernetes cluster. Its like nodemon but for k8s.
Prerequisites
There are certain tools that you need to have installed on your computer to follow along this setup.
- Docker for Desktop (Available for both Mac and Windows) - This comes with kubernetes out of the box, so you just have to go into preferences and enable it. If your Docker version doesn't have the option of Kubernetes, you can go ahead and install Minikube seperately.
- Skaffold - In the "Installing Skaffold" section of the docs, you will find all the instructions for installing Skaffold on your respective operating systems. Go ahead and install that.
- Dockerhub account - If you don't have one, follow the link and create a dockerhub account as this is where we will push our image.
If you prefer to follow a video tutorial, I have also created a step by step video which you can follow.
Overview
In this section, I will give you an overview about the steps that we will follow to get this setup up and running. For the purposes of this demo, I will create a basic Node server with Express and just a basic GET endpoint so we can see some response in the browser. You can follow these setup steps for any server and they should be more or less the same.
Let's start
Step 1 - Express App
I will first create an empty directory inside my workspace and give it the name of the app. I am calling it blog. Inside this folder, I will first initialize package.json with this command npm init -y and then install couple of packages -
npm i express nodemon
Inside the blog directory within src folder I will create index.js and write my express code here.
const express = require('express');
const app = express();

app.get('/api/blog', (req, res) => {
  res.json({ message: "Hello world!" })
});


app.listen(3000, () => console.log('listening on port 3000'))
In our package.json, go ahead and add the script to run the app using nodemon.
{
  "name": "blog",
  "version": "1.0.0",
  "description": "",
  "main": "index.js",
  "scripts": {
    "start": "nodemon src/index.js"
  },
  "keywords": [],
  "author": "",
  "license": "ISC",
  "dependencies": {
    "express": "^4.17.1",
    "nodemon": "^2.0.4"
  }
}
At this point, your directory structure will look something like this -
.
└── root
    └── blog
        ├── node_modules
        ├── package.json
        ├── package-lock.json
        └── src
            └── index.js
Now, let us make sure we are able to spin up the app and get the json response. Type npm start in your terminal and then test the endpoint either from postman or browser by hitting localhost:3000/api/blog.
Step 2 - Build Docker Image
As the next step, let's write out the Dockerfile so we can wrap our app inside the container. At the root of your blog folder, create the file and name it exactly as Dockerfile with capital D. The file should be at the same level as your package.json.
# Use this as the base image
FROM node:10-alpine

# Create a directory for our code inside the container.
WORKDIR /app

# Copy package.json files so we can install node_modules
COPY package.json package-lock.json /app/

# install node_modules
RUN npm install

# Copy rest of the code from local filesystem to the container
COPY . .

# Run the app using the script we added in package.json
CMD ["npm", "start"]
To make sure everything works together so far, let us build the image
So we first build the image and and tag it with -t flag and you can give it any name but generally the convention is <dockerhub-username>/<app-name>. We can then run this image using docker run command. Please note the special flag -p 3000:3000 we passed there. We are telling the docker that any traffic from our browser targeted to localhost:3000 should be forwarded to port 3000 in our container, because this is where our app is listening for the request.
Step 3 - Push the image to dockerhub
After this test, if you have not faced any errors, our image is perfectly good to be pushed to dockerhub. In your terminal, you will first need to login into your dockerhub account -
$ docker loginYou will be prompted for username and password, enter those and once you get the confirmation that you have successfully logged in, its time to push the image we just created to docker hub -
$ docker push <your-username>/<app-name>

# In my case, it will be
$ docker push amourycodes/blog
When you push a new image for the first time, it might take a while for this process to complete. I will explain to you why we had to go through this step of pushing the image to dockerhub, shortly.
Step 4 - Kubernetes setup
Since we have already enabled Kubernetes from our docker desktop, let's make sure we have k8s engine running, listening to kubectl commands.
$ kubectl get pods
No resources found in default namespace.
This tells us that kubectl commands are working and currently we don't have any pods or deployments running locally. So let's go ahead and create our first deployment for our app - blog.
Change over to your root blog and create another directory k8s
.
└── root
    ├── blog
    └── k8s
Inside the k8s directory, create a new file and name it as blog-deployment.yaml or blog-depl.yaml. Again, the filename can be anything, but I like to follow the convention <app-name>-<k8s resource>.yaml
apiVersion: apps/v1
kind: Deployment
metadata:
  name: blog-depl
spec:
  replicas: 1
  selector:
    matchLabels:
      app: blog
  template:
    metadata:
      labels:
        app: blog
    spec:
      containers:
        - name: blog
          image: amourycodes/blog
This is a very standard deployment file. As I mentioned earlier, I am assuming you have a basic understanding of each line in the file, so I am not going through each line here. But the important thing to note is under containers -> image you will notice the name of our image that we just pushed to dockerhub.
Now using the command kubectl create -f blog-depl.yaml, you can 100% create the deployment and using the command kubectl get deployments you should now be able to see this deployment running. But at this point this deployment is kind of useless and we have not configured it to expose any ports and so our app will not be accessible either from the outside world or from any other nodes / pods in the cluster.
To configure this, we will first have to write another k8s resource called Service. So let's go ahead and add it to the same file that we just created.
apiVersion: apps/v1
kind: Deployment
metadata:
  name: blog-depl
spec:
  replicas: 1
  selector:
    matchLabels:
      app: blog
  template:
    metadata:
      labels:
        app: blog
    spec:
      containers:
        - name: blog
          image: amourycodes/blog

---
apiVersion: v1
kind: Service
metadata:
  name: blog-service
spec:
  selector:
    app: blog
  ports:
    - name: blog
      protocol: TCP
      port: 3000
      targetPort: 3000
Make sure to add the --- seperator between the two configs. In yaml this tells that they are two seperate files / configurations independent of each other.
At this point, our app can be accessed from other pods within the cluster. We still won't have the access from outside the app since the configured service is of type ClusterIP. To access the app at this point, we will need to explicitly set the service type as NodePort.
To access your endpoint from the browser, you can make the following change in your blog-deployment.yaml file
apiVersion: apps/v1
kind: Deployment
metadata:
  name: blog-depl
spec:
  replicas: 1
  selector:
    matchLabels:
      app: blog
  template:
    metadata:
      labels:
        app: blog
    spec:
      containers:
        - name: blog
          image: amourycodes/blog

---
apiVersion: v1
kind: Service
metadata:
  name: blog-service
spec:
  type: NodePort
  selector:
    app: blog
  ports:
    - name: blog
      protocol: TCP
      port: 3000
      targetPort: 3000
      nodePort: 30007
Now before you apply this change, make sure to kill your old service. You can do so by typing the command
kubectl delete service blog-serviceand then create the service again by typing kubectl create -f blog-deployment.yaml. You might see an error that deployment already exists, nothing to worry about, since we only deleted the service and not the deployment.
At this point, you will have an access to the app from outside world and you can test this by typing
curl http://localhost:30007/api/blog

{"message":"Hello world!"}
Okay! Now moving forward...
Step 5 - Configure Ingress Controller and Load balancer
Unlike other resources such as Pods, Services and Deployments, Ingress Controller is not a native Kubernetes resource. In order to use Ingress controller, we need to first add it to the cluster and then configure it.
There are different flavors of Ingress available. Ingress-Nginx is the project maintained by official Kubernetes team. For this setup, I will make use of ingress-nginx.
If you click this link, you will find the instructions for the installation depending on your environment. If you are using Docker for Mac / windows, the below command should work. Copy the below command in your terminal
kubectl apply -f https://raw.githubusercontent.com/kubernetes/ingress-nginx/master/deploy/static/provider/cloud/deploy.yamlOnce this is done successfully, we will configure the ingress service to add some rules for accessing our app -
Inside our k8s directory, create a new file (I am naming it ingress-service.yaml), feel free to name whatever you think is appropriate and add the following code from docs -
apiVersion: extensions/v1beta1          # Should be as per docs
kind: Ingress                           # Should be as per docs
metadata:
  name: ingress-service                 # Name of the service as per your pref
  annotations:
    kubernetes.io/ingress.class: "nginx"
spec:
  rules:
    - host: amoury.com                  # Whatever domain you want to use to access locally on your machine. This will be added to hosts file
      http:
        paths:
          - path: /api/blog             # The path at which you want to access the app
            backend:
              serviceName: blog-service # Name of the service we previous configured.
              servicePort: 3000         # Port at which the service is exposed
Your app is now accessible from the browser. All you need to do is add that host domain we added in the ingress config to the hosts file.
Step 6 - Modify host file
Inside the terminal
sudo code /etc/hosts # You only need to add `sudo` if you are not already logged in as a root user.Now just add the line 127.0.0.1 amoury.com to this file and save it.
If you now try to access amoury.com/api/blog, you will see the json response that we added in the app. If you encounter some certificate related issue and are not able to find the button to go ahead, just click any where on the page and type thisisunsafe and hit enter / refresh.
Now the only thing we are missing here for development environment is some way to watch the changes. Let us go ahead and configure this using Skaffold tool.